Saturday, March 17, 2012

Spring Break Fun!

Oh spring break. A time to relax, get over a cold and be productive! 


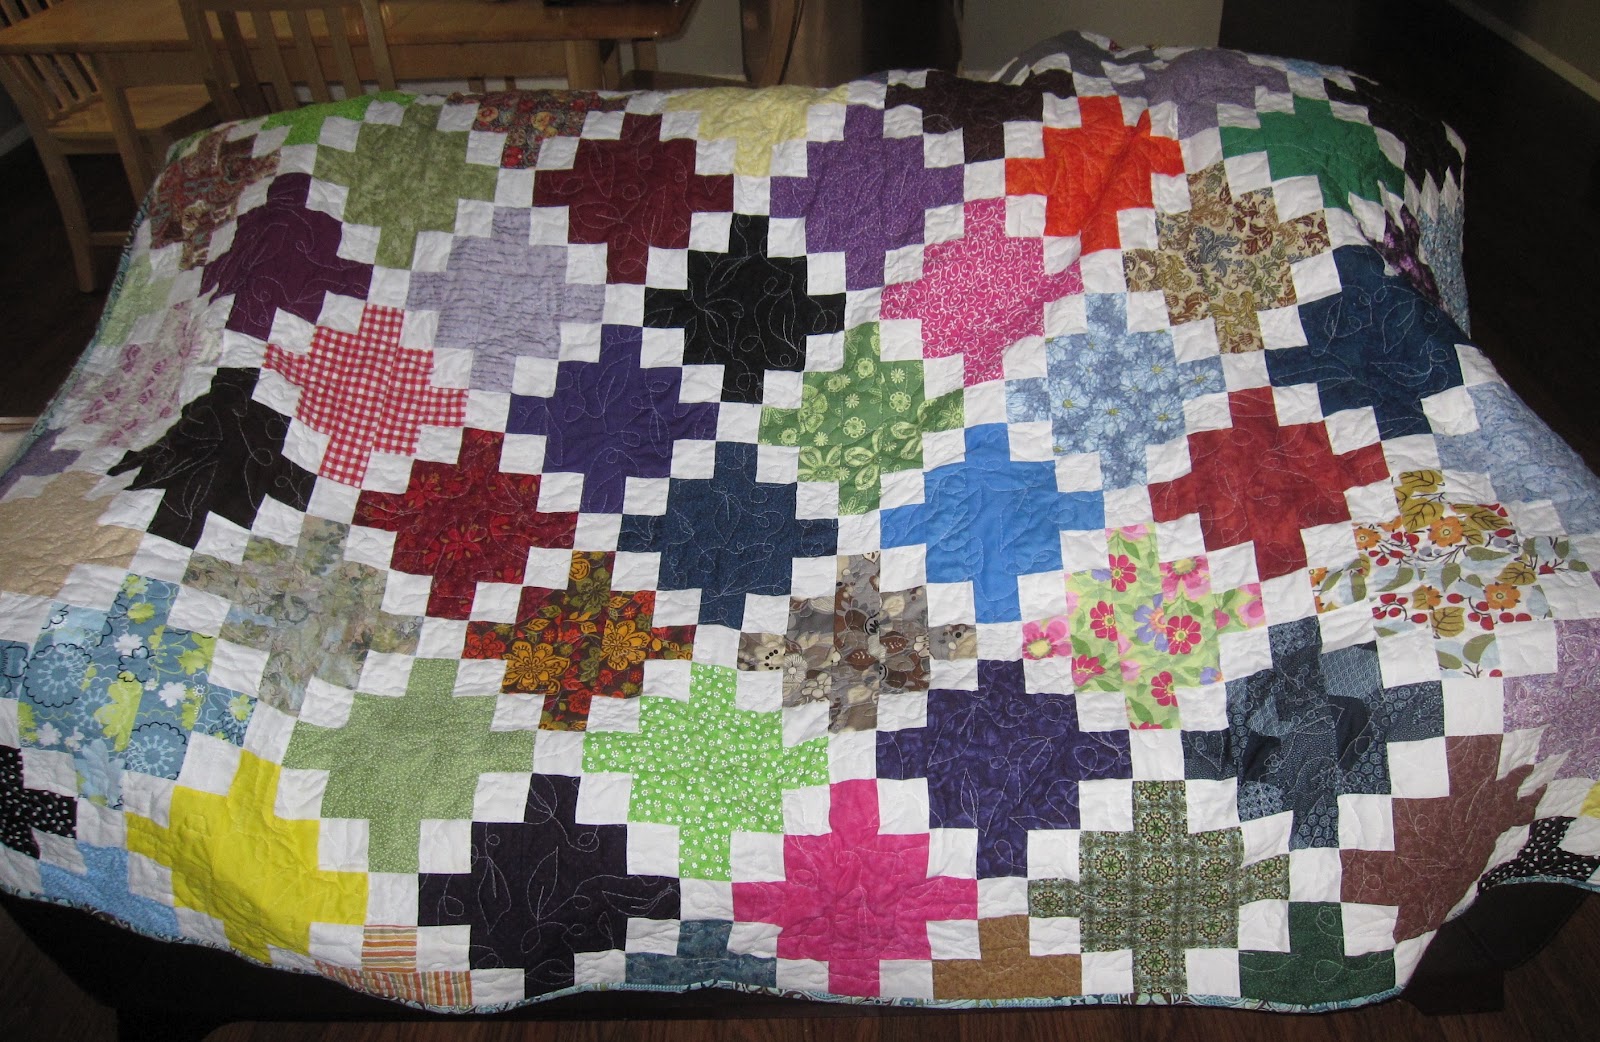
I finished quilting my scrappy quilt and am so excited with the end result! A big kudos to my husband for letting me take over the kitchen table with the quilt and sewing machine for the past week! One day I will have my dream sewing room where I won't have to take over the kitchen table anymore! For now I work with what I got! 


I am currently in the process of sewing the binding on. It is an endless process. All I have to say is thank goodness for TV and a comfy couch! 


After I finished quilting my scrappy quilt I needed a break from it. I completed a quilt top for a baby quilt. I still am deciding what I want the backing to look like This is the first of a ton of baby quilts this year. Too many friends are having babies, however it means lots of fun projects for me! :-)


On a side note, I spent some time exploring lots of new music recently and with that came watching some music videos. Here is one of my new favorite! Thank you to The Black Keys for keeping me entertained!

Monday, March 12, 2012

Newest Additions

It is one of my favorite times of year. Spring break! This is the time that I can finally get stuff done around the house and not have to worry about rushing off to work. I'm finally working on unpacking the miscellaneous box that hasn't been touched since we moved into our house 2 1/2 years ago. The office looks like a war zone as I'm unpacking it, but I'll be glad when the box is gone. It's funny all the random stuff I'm finding in it. Just to name a few items: a staff handbook from a school I taught at in Arizona, kids VHS videos, random stuffed animals, a Leonardo ninja turtle pez dispense and a cassette tape of me singing with an honor choir in elementary school. 


Amidst my productivity I posted 3 new items on my Etsy shop today!


Saturday, March 10, 2012

Quilt Top Complete!

After months and months of working on this quilt, the quilt top is finally finished! I'm super proud of this quilt, and most importantly, all of the fabric scraps came directly from my fabric stash. The only fabric purchased for this quilt was the backing and the binding. Now the quilting process has begun! 


I have done a lot of quilting using a basic meandering patterns like this, however I have gotten bored with this pattern. 


I decided to quilt using wandering loops and leaves. Many of the leaves I love, many I don't, however I definitely like this pattern way more than a basic wandering pattern. Yes, I know there are lots of imperfections and if any serious quilter saw my free motion quilting they might scoff at my quilting and pick at all imperfections. Fine by me. Quilting is a learning process and I can see that each time I free motion quilt it gets better every quilt. I can't wait to see the final product! 


Sunday, February 26, 2012

Wedding Flowers

We got our wedding photos from our photographer last week and they turned out beautifully! I'm super excited to have lots of photos of the flowers I made! For those of you who don't remember, I made all the flowers for our wedding. As I researched the cost of wedding flowers I was floored at how ridiculous they cost. So I thought and got on Google and decided that I just needed to make the flowers. It really wouldn't be like me to have cut flowers anyways. I made my bouquet, 2 bridesmaids bouquets, wrist corsages and boutonnieres. After much trial and error I'm more than happy with the result of making them. 


Anyone who is on the fence about making their own flowers, I highly recommend it. They not only will be easily preservable, but they are really unique and a great conversation piece. Major sewing skills aren't necessary. Anyone with an ounce of creativity (or a creative friend) can make their own flowers. However if you are planning on taking on this project I have a few suggestions:

  1. Get on Google and look at lots of photos of flowers to see what you want to imitate. I settled with white and ivory flowers because it worked with our wedding colors (navy, white and silver). 
  2. Be prepared for trial and error. Just because you found 6 great flower tutorials online doesn't mean that when you combine those flowers together in a bouquet they are going to look good. 
  3. Don't be afraid of fabric! I hate working with satin fabrics and organza. They fray and slip when you try to cut them, but I sucked it up and in the end they really brought great textures to my bouquet. If you want to make a bouquet with color definitely experiment with different fabrics until you find something you love. 
  4. Learn to love your zippo lighter. I don't know how long I spent burning the edges of fabric to give them the appearance of petals! 
  5. When you are ready to put all your flowers together in a bouquet, get back on Google and look at how bouquets are wrapped. I looked at lots of floral sites until I decided on what I wanted to do. 
  6. If you are doing bouquets, corsages and boutonnieres, don't kill yourself. I won't lie. It's a lot of work. However, make some easy flowers! The wrist corsages were super easy and a breeze to make! My tutorial for the boutonnieres can be found here

All wedding photos by Kelly Miranda Photography


Tuesday, February 21, 2012

Saturday, February 18, 2012

Sunday, February 12, 2012

Baby Gifts

Costumes have been competed for Carnaval! I must say they looked really good!!! As the theme to Carnaval this year was the Wizard of Oz, it only made sense that our entire bateria (group of 50 drummers) were dressed as munchkins. This is the first year where the boy drummers and girl drummers really looked like different people. Yes, the ladies were wearing flower pots on their head. Thanks to my wonderful costuming cohorts make this a great costuming hear. 


Now that Carnaval is over, it's baby gift time. I currently know 8 people that are having babies in the next year. That's a lot of gifts! Here is my first round. 

I was really excited to find this book panel at JoAnn Fabrics! 


This is one of my favorite baby quilt panels I have ever found! It measures 45"x36" and I found it at JoAnn Fabrics. My most favorite part is the backing (see below). To quilt the back and front together I followed the outline of each animal. This made it very easy to complete and did not take away from the design of the panel.